Running your own WordPress theme and plugin update server
In this tutorial, we’ll cover how to use a $5 Digital Ocean droplet to serve updates for WordPress themes and plugins using the code provided here.
Setting up the update server
Step 1: Sign up to Digital Ocean, fund your account
If you’ve never used Digital Ocean before, there may be a brief period before you can create a Droplet while staff manually approve your account.
A “Droplet” is another word for virtual private server (VPS). When one is spun up, you get unrestricted access to do whatever you want with it. As you might imagine, Digital Ocean takes some basic steps to make sure they’re not providing them to spammers, fraudsters and other bad actors. This approval process is one of those steps.
Once you’re approved, you can spin up new Droplets (up to a certain point) instantly.
Step 2: Create a Droplet
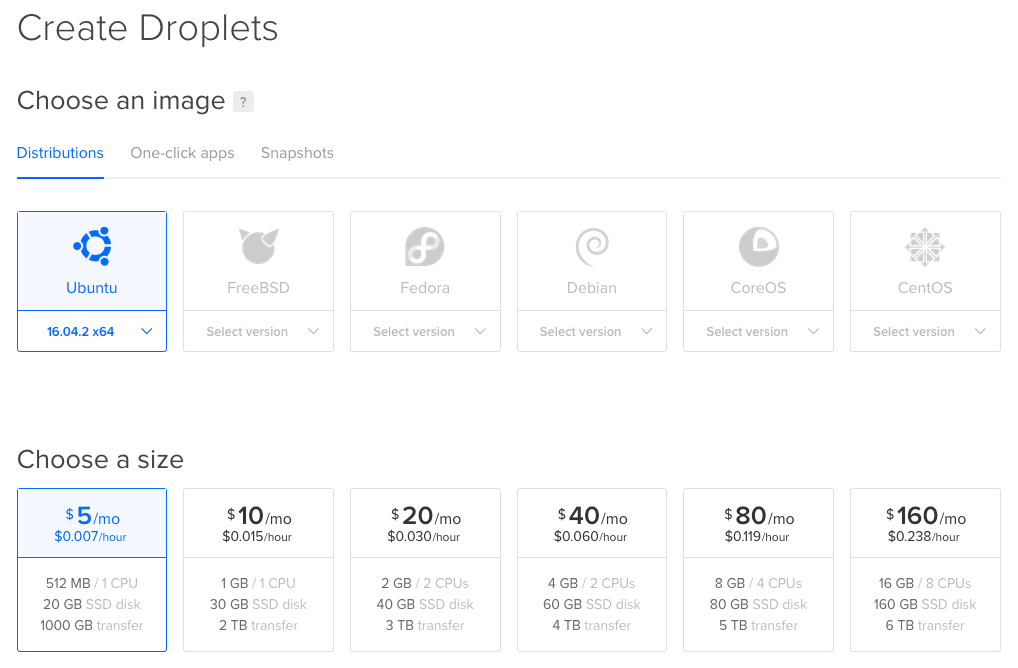
Under “Choose an Image” select: Ubuntu 16.04.2 x64
Under “Choose a Size” select: $5/mo (this can always be upgraded later, but we like to start small)

Under “Choose a datacenter region” choose a location near you, or your clients. I prefer NYC2 because it’s the closest one to me in Washington, DC.
Leave “Add block storage” and “Select additional options” and “Add your SSH keys” (we’ll be adding this later) alone.
Only create one droplet, and choose the hostname to whatever you want, or leave it as the default. The hostname doesn’t matter that much.
Finally, click the “Create” button.
Step 3: Initial server setup
It will take a couple minutes or so to deploy the Droplet. When it’s finished, you’ll receive an email with the IP address and root password.
From here, I highly recommend following the Initial Server Setup with Ubuntu 16.04 guide.
For the rest of this tutorial, we’ll assume you’ve added a non-root user, added public key authentication, disabled password authentication, and set up a basic firewall.
All of these are explained very well in the above tutorial, and we don’t want to reinvent the wheel here.
In addition to all the instructions you find there, you’ll also need to configure the firewall to allow incoming connections to both HTTP and HTTPS.
To do that, run the following commands:
sudo ufw allow http
sudo ufw allow https
For further reference, see UFW Essentials: Common Firewall Rules and Commands.
Considering how we’ll be using this server (pushing theme/plugin updates to who knows how many sites), this server would be a prime target for hackers.
Let’s make it difficult as possible for them.
Step 4: Install Apache
Run the following command to install Apache. We’ll be following along the How To Install Linux, Apache, MySQL, PHP (LAMP) stack on Ubuntu 16.04 guide.
But don’t skip ahead and install anything but Apache at this point.
sudo apt-get update
sudo apt-get install apache2
Once that’s installed, we’ll need to let Apache know what domain or IP it should be listening to. I use updates.themetry.com, so let’s go with that.
Open the Apache configuration file with the following command:
sudo nano /etc/apache2/apache2.conf
Then add the following line at the end of the file:
ServerName updates.themetry.com
Of course, replace updates.themetry.com with your own URL.
Finally, restart Apache for these changes to go into effect.
sudo systemctl restart apache2
Theoretically, you could also just use the IP address. But this could cause major problems down the road if you were ever forced to give up the IP address, because every theme or plugin in the wild hardcodes the update server URL.
Using a domain keeps things more flexible in the future.
If you haven’t already, point the domain to the server IP address. Once it resolves, at this point, you should be able to see the default Apache page when accessing the URL.
Step 5: Install a Let’s Encrypt certificate
To hinder man-in-the-middle attacks, we want to make sure we’re serving our updates over HTTPS, so let’s install a free Let’s Encrypt certificate.
We’ll be following along with the How To Secure Apache with Let’s Encrypt on Ubuntu 16.04 guide to do this.
First, install the Let’s Encrypt client for Apache.
sudo apt-get install python-letsencrypt-apache
Then, grab the certificate and auto-configure the Apache settings.
sudo letsencrypt --apache -d updates.themetry.com
Your domain will need to be resolving to the server IP address before this will work, so check on whatsmydns.net to be sure before running.
If you’re using a top level domain, like themetry-updates.com, you might want to get certificates for both www and non-www versions, like this:
sudo letsencrypt --apache -d themetry-updates.com -d www.themetry-updates.com
Answer a few questions, like your email address, and you’ll eventually be greeted with a screen like this:

At this point, you should now be able to access https://updates.themetry.com with a nice green padlock icon.
![]()
Let’s Encrypt certificates are only good for 90 days, so it’s a good idea to set up an auto-renewal so you don’t have to worry about doing it manually. Refer back to the previously linked guide for more information on that.
Step 6: Clone the Automatic Theme/Plugin Updater repository
Navigate to the webroot with the following command:
cd /var/www/html
Since Git doesn’t like cloning into non-empty directories, we’ll preemptively delete the index.html file already there with the following command:
rm index.html
You may also need to change the ownership of the /var/www/html to the current user before you’re allowed to clone.
At this point, I’m assuming you’re logged in as the non-root user you should have set up in Step 3.
sudo chown -R youruser:youruser /var/www/html
Of course, replace “youruser” with whatever username you chose. You may be asked for your user password before this action can be completed, so have it handy.
Finally, clone the repository with the following command:
git clone https://github.com/jeremyclark13/automatic-theme-plugin-update.git .
We only want the contents of the api/ directory on our update server, so let’s delete everything else.
rm -rf .git/
rm -rf theme/
rm -rf plugin/
rm readme.md
rm readme.txt
If you’re comfortable connecting over sFTP with an SSH key and uploading the api/ directory instead, that would be fine too.
Step 5: Install PHP
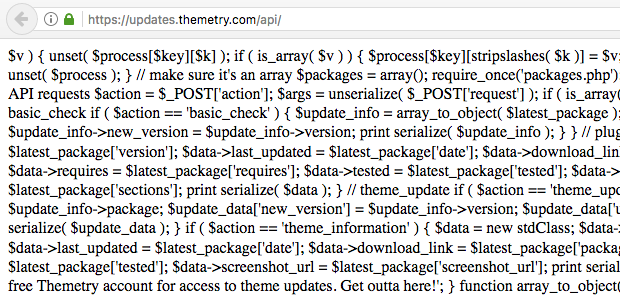
Try accessing example.com/api/index.php right now. Notice a huge hunk of unparsed PHP?

This is because we haven’t installed PHP yet. Let’s do that with the following command:
sudo apt-get install php libapache2-mod-php
Then restart Apache for good measure:
sudo systemctl restart apache2
Now try accessing example.com/api/index.php again. At this point, you should see a bare page that contains the following text: Whoops, this page doesn’t exist
This also confirms PHP is running on the server now.
Step 6: Protect direct .zip access
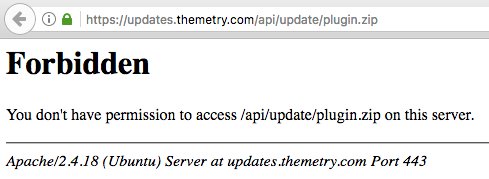
Try accessing example.com/api/update/plugin.zip.
It prompts you to download plugin.zip, and that’s not supposed to happen.
The .htaccess file in the api/update/ directory should be blocking that, but Apache seems to be ignoring it.
To adjust, we’ll need to edit the apache.conf file:
sudo nano /etc/apache2/apache2.conf
Find this part:
<Directory /var/www/>
        Options Indexes FollowSymLinks
        AllowOverride None
        Require all granted
</Directory>
And change it to this:
<Directory /var/www/>
        Options Indexes FollowSymLinks
        AllowOverride All
        Require all granted
</Directory>
Overrides (via .htaccess) are now allowed within our webroot directory.
Again, let’s reboot Apache for good measure.

Now, you’ll be greeted with the above.
At this point, we have a functional update server, but nothing to update.
Step 7: Make your themes and plugins updateable
For themes, you’ll need to require the update.php from your functions.php file in the after_setup_theme hook. To keep things neat, you might want to place the update.php file in the inc/ folder, or similar.
function prefix_theme_updater() {
	require( get_template_directory() . '/inc/update.php' );
}
add_action( 'after_setup_theme', 'prefix_theme_updater' );
If this is a child theme, you’ll want to comment out the “Parent Theme” section and uncomment the “Child Theme” section.
Change the $api_url to your API URL. For me, it’s https://updates.themetry.com/api/.
Similar process for plugins, just use the sample plugin as a base instead, and include from the main plugin file.
include( dirname( __FILE__ ) . '/update.php' );
In any case, be sure to take note of the theme or plugin slug, because we’ll need them for the next step.
Step 8: Release an update
At some point, you’ll want to release an update to your non-WordPress.org theme or plugin.
Zip it up, just like any other theme or plugin package, and place the .zip file in the api/update/ directory. The file name doesn’t matter. I might use something like theme-slug-v1.2.0.zip, adjusting the slug and version number.
Now, edit your api/packages.php file to add the new package, in a similar vein to what you see here.
The version should match what’s in the updated theme or plugin’s header. In a theme, this would be find in the style.css file. In a plugin, this would be found in the main plugin file.
Adjust everytihng else to match. Pay special attention to the package URL (I would change mine to https://updates.themetry.com/api/download.php...) and file name (should match whatever .zip file you put in the api/update/ directory).
Step 9: Wait for site admins to update
At this point, any sites running WordPress themes or plugins with update.php properly configured from Step 7 will eventually be notified an update is available.
Instead of downloading the update from WordPress.org, it’ll download from your update server.
Frequently Asked Questions
Okay, nobody actually asked any of these questions. But below are some answers to questions you might be wondering about.
Can’t I just use my regular web hosting account for this too?
Sure you can. I decided to set up a different server because:
- This script was designed for Apache (hence all the .htaccess files). I use Nginx.
- I prefer to keep my web server reserved for serving website visitors only.
- If my “main” server crashes, updates can still be served to my users.
- Easy Let’s Encrypt installation, which may not be supported by a shared host.
- $5 / month is a small price to pay for all of the above benefits.
Because of these reasons, I’d recommend following this guide to the letter, but it’s ultimately up to you.
Can’t I just use WordPress.org as my update server?
Sure you can, but there are a few reasons why you might not want to.
- You’re a theme developer who is tired of the “draconian” review process.
- Your theme or plugin does not meet the WordPress.org guidelines.
- Your theme or plugin is intended only for clients.
For me, I wanted an easy way to get my free themes out there with a familiar update mechanism, without having to wait months for a WordPress.org theme review to complete.
But I heard someone say WordPress themes from random sites are unsafe
Yes, that was me. You should be skeptical of any code you put on your server, even if it’s downloaded from WordPress.org.
It’s up to you to determine the credibility of the source of your download. Although I’m obviously biased, Themetry is a trustworthy place to download themes from.
Can I charge people recurring fees for license keys and cut off their access if they don’t pay?
With a lot of time spent on customization, probably.
Alternatively, you could just buy the Software Licensing and Recurring Payments addons for Easy Digital Downloads and have something up and running in minutes.
I tend to recommend commercially-supported products for things you depend on as crucial aspects of your business.
Wrapping up
Cool, so at this point you should have your own working WordPress theme and plugin update server!
The script hasn’t been updated in over two years, and could use some fine-tuning to keep up with WordPress Coding Standards, among other things. I’ll see about forking it myself and maintaining it from here on out.
This tutorial is a precursor to some new free theme offerings here at Themetry, so stay tuned for that.