Displaying page-specific header images in the Beautiful Pro theme
This is a tutorial revolves around StudioPress’s Beautiful Pro theme. This is a Genesis child theme and is not included in Themetry’s theme collection.
However, the concepts discussed here can apply to many more WordPress themes.
Inspect the header image banner
Before we dive in the code, we first want to investigate how exactly Beautiful Pro handles the header image banner.
To do this, we’ll visit the Beautiful Pro demo site, right click on the header image, and click “Inspect Element” (may differ depending on the browser, I’m using Firefox).
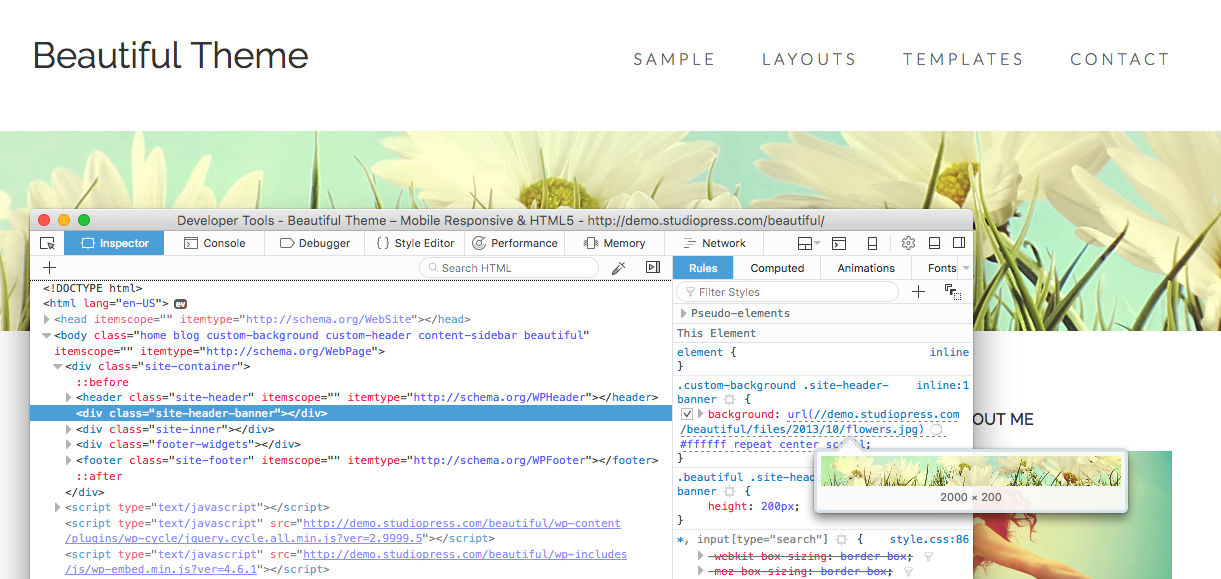
We can see that this header image is crafted with an empty “site-header-banner” div, with the image applied as a background in CSS.
By hovering over the image URL, we are made aware of the dimensions of the image: 2000×200. That’s 2000 pixels wide by 200 pixels high.
While we could go a step further and adjust Beautiful Pro to accommodate different-sized header images, we want to stay focused on the topic at hand. The header size fits in perfectly with the design as-is, so we don’t want to go against the grain here.
Post-inspection recap
At this point, we’ve determined a few things:
- The dimensions we’ll need to stick to for custom header images: 2000×200
- The fact that header images are applied with CSS background images, not <img> tags.
- The CSS selector we need to override for a new header image to take precedence.
With this information, we now know the header images can be customized with nothing more than a hint CSS. We’ll add new images in the Media Uploader. No additional plugins or code editing necessary.
This content is restricted to subscribers
Feel free to place this code in your Custom CSS box in Customizer, or directly in the stylesheet of the theme. Your choice.
Finally, rinse and repeat for however many posts you’d like to override the custom header image banner on. 🙂